Receipts to Data in Seconds: The Power of Azure Serverless (Part 1/2)
Leveraging Azure AI Document Intelligence for automated, serverless extraction.
In this post, I’m going to walk you through building a Serverless Receipt Processing Application on Azure. Understand the architecture how the components work together from backend to frontend.
The Goal: To create a "drop-and-forget" system where you upload a receipt image, and seconds later, structured data appears in your database.
What We Are Building?
We will leverage the event-driven power of Azure Functions combined with the pre-trained models of Azure AI Document Intelligence to create a solution.
Here is how the end result will look like:
Let’s dive into the architecture.
Architecture Design
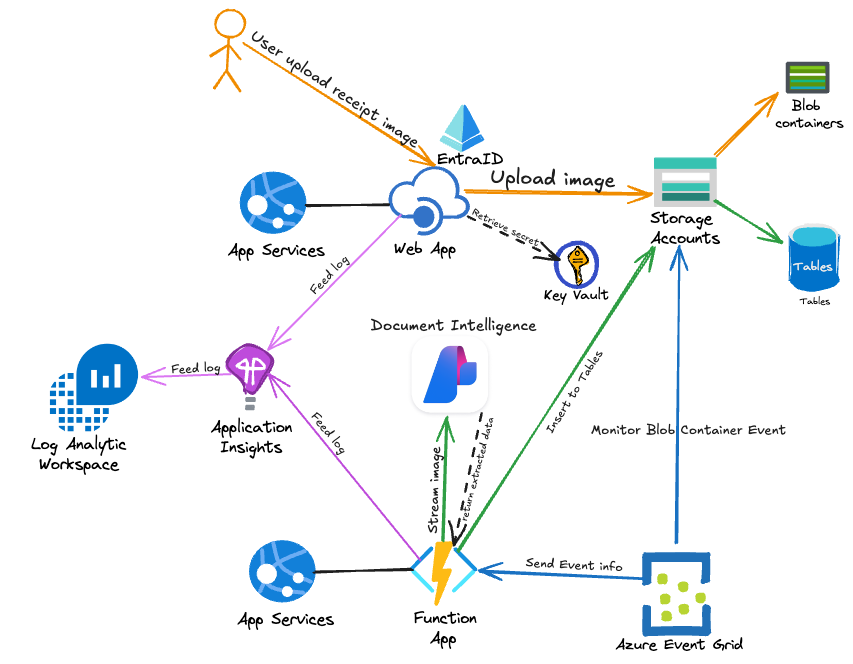
Before writing any code, it is helpful to visualize how our data flows through the system. We are using an Event-Driven Architecture, meaning our code sits idle until an event (a file upload) triggers it to wake up and work.
Here is the flow of operations
- Ingestion (Blob Storage): The user uploads a receipt image (JPG, PNG, or PDF) to a specific "Input" container in Azure Blob Storage.
- The Trigger (Azure Functions): An Azure Function is configured with a Blob Trigger. As soon as the new file lands in storage, the function automatically wakes up and picks up the file reference.
- Extraction (Azure AI Document Intelligence): The Azure Function sends the image stream to the Azure AI Document Intelligence API (specifically the pre-built Receipt model).
- Processing: The AI service analyzes the image and returns a JSON object containing key fields like MerchantName, TransactionDate, Tax, and Total.
- Storage (Cosmos DB): The Azure Function parses the response and saves the structured data into Azure Cosmos DB (or SQL Database) for easy querying and reporting.
Prerequisites
VSCode Extension - Terraform - Python - Azure Tools (Sign in with your Entra ID) - Azure App Service - Azure Function - Azure Storage
- An Azure subscription with appropriate permissions
The Stack
- Azure Blob Storage (Hot tier)
- Azure Functions (App Service Plan)
- Azure AI Document Intelligence (Pre-built Receipt Model)
- Azure Tables [*It could be an Azure Cosmos DB (NoSQL) or any other DB]
- Application Insights
- Log Analytics Workspace
- EventGrid
- Web App (App Service Plan)
Note
In this demo, our primary focus will be on the cloud stack and its functionality. As a result, elements related to the Network and Security stack, such as Private Endpoint and VNet Integration, will not be addressed.
Phase 1 Deployment: Core Infrastructure
In this phase, we will provision the "brain" (Document Intelligence), the "body" (Function App), and the "memory" (Storage), along with the monitoring infrastructure.
Clone Project Repository
git clone https://github.com/moderngolf-code/receipt2data.git
Folder Structure
receipt2data
├── ReceiptApp-FunctionApp         # Python code for Function App
├── ReceiptApp-Infra               # Terraform for this project infra
└── ReceiptApp-Web                 # .NET Web App
Deployment Steps
1. Authenticate with Azure
az login
az account set --subscription "your-subscription-id"
2. Initialize Terraform
cd ReceiptApp-Infra
terraform init
3. Plan the Deployment
terraform plan -target="azurerm_linux_function_app.fn" \
  -target="azurerm_role_assignment.fn_blob_reader" \
  -target="azurerm_role_assignment.fn_table_contributor" \
  -target="azurerm_role_assignment.fn_ai_user" \
  -target="azurerm_role_assignment.ai_blob_reader"
4. Apply Infrastructure (First part)
Deploy the core infrastructure first:
terraform apply -target="azurerm_linux_function_app.fn" \
  -target="azurerm_role_assignment.fn_blob_reader" \
  -target="azurerm_role_assignment.fn_table_contributor" \
  -target="azurerm_role_assignment.fn_ai_user" \
  -target="azurerm_role_assignment.ai_blob_reader"
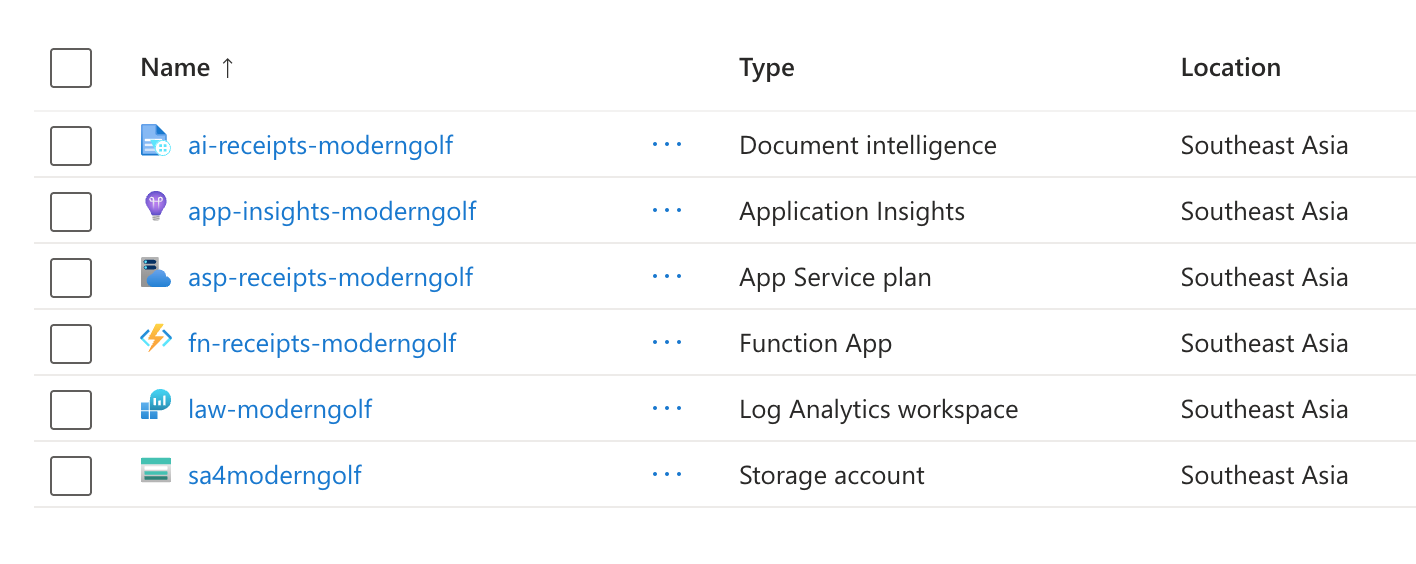
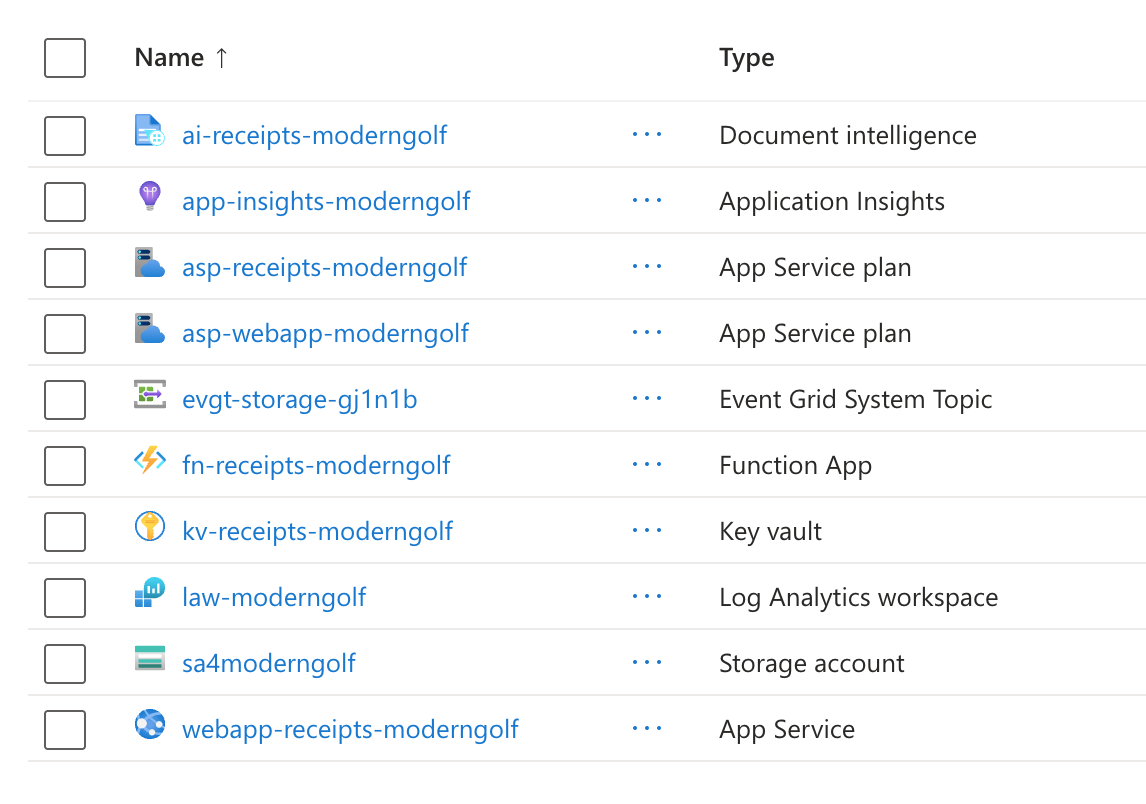
This is what created in Azure Portal for this first part.
Phase 2: Code Deployment & Event Wiring
In Phase 1, we provisioned the empty infrastructure. In Phase 2, we breathe life into the system by deploying the Python application logic and "wiring" the Event Grid trigger.
Why this order matters
We must deploy the Function App code before creating the Event Grid Subscription. Event Grid attempts to validate the endpoint immediately upon creation; if the specific Function Trigger doesn't exist yet, the Event Grid subscription creation will fail.
FunctionApp
Our Python function acts as the orchestrator. It receives the event from storage account, ensures idempotency (preventing duplicate processing), calls the AI service, and saves the result to Table Storage.
FunctionApp file: function_app.py
Deploy function_app.py to FunctionApp
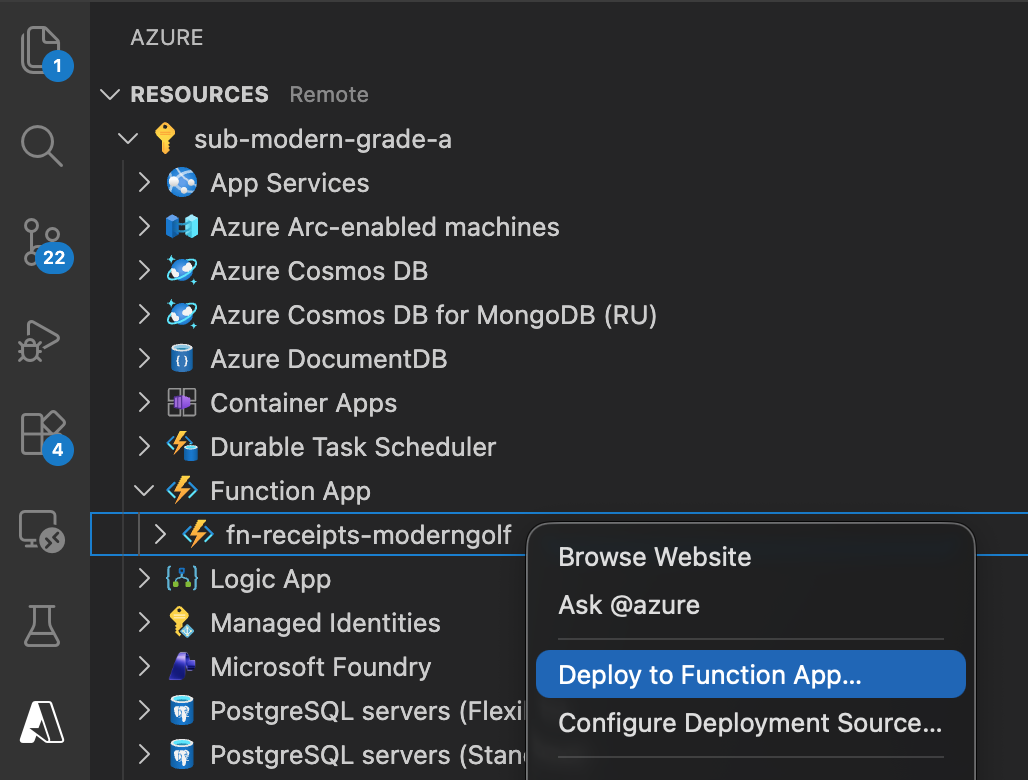
Using VS Code
- Install Azure Functions extension
- Sign in to Azure
- Right-click on the function folder
- Select "Deploy to Function App"
- Follow the prompts
Complete Deployment
Apply the remaining resources (Event Grid subscriptions) using terraform
terraform apply
Resources in Azure Portal
You will have additional resources created after previous Terraform apply
- Event Grid
- KeyVault
- AppServicePlan
- WebApp
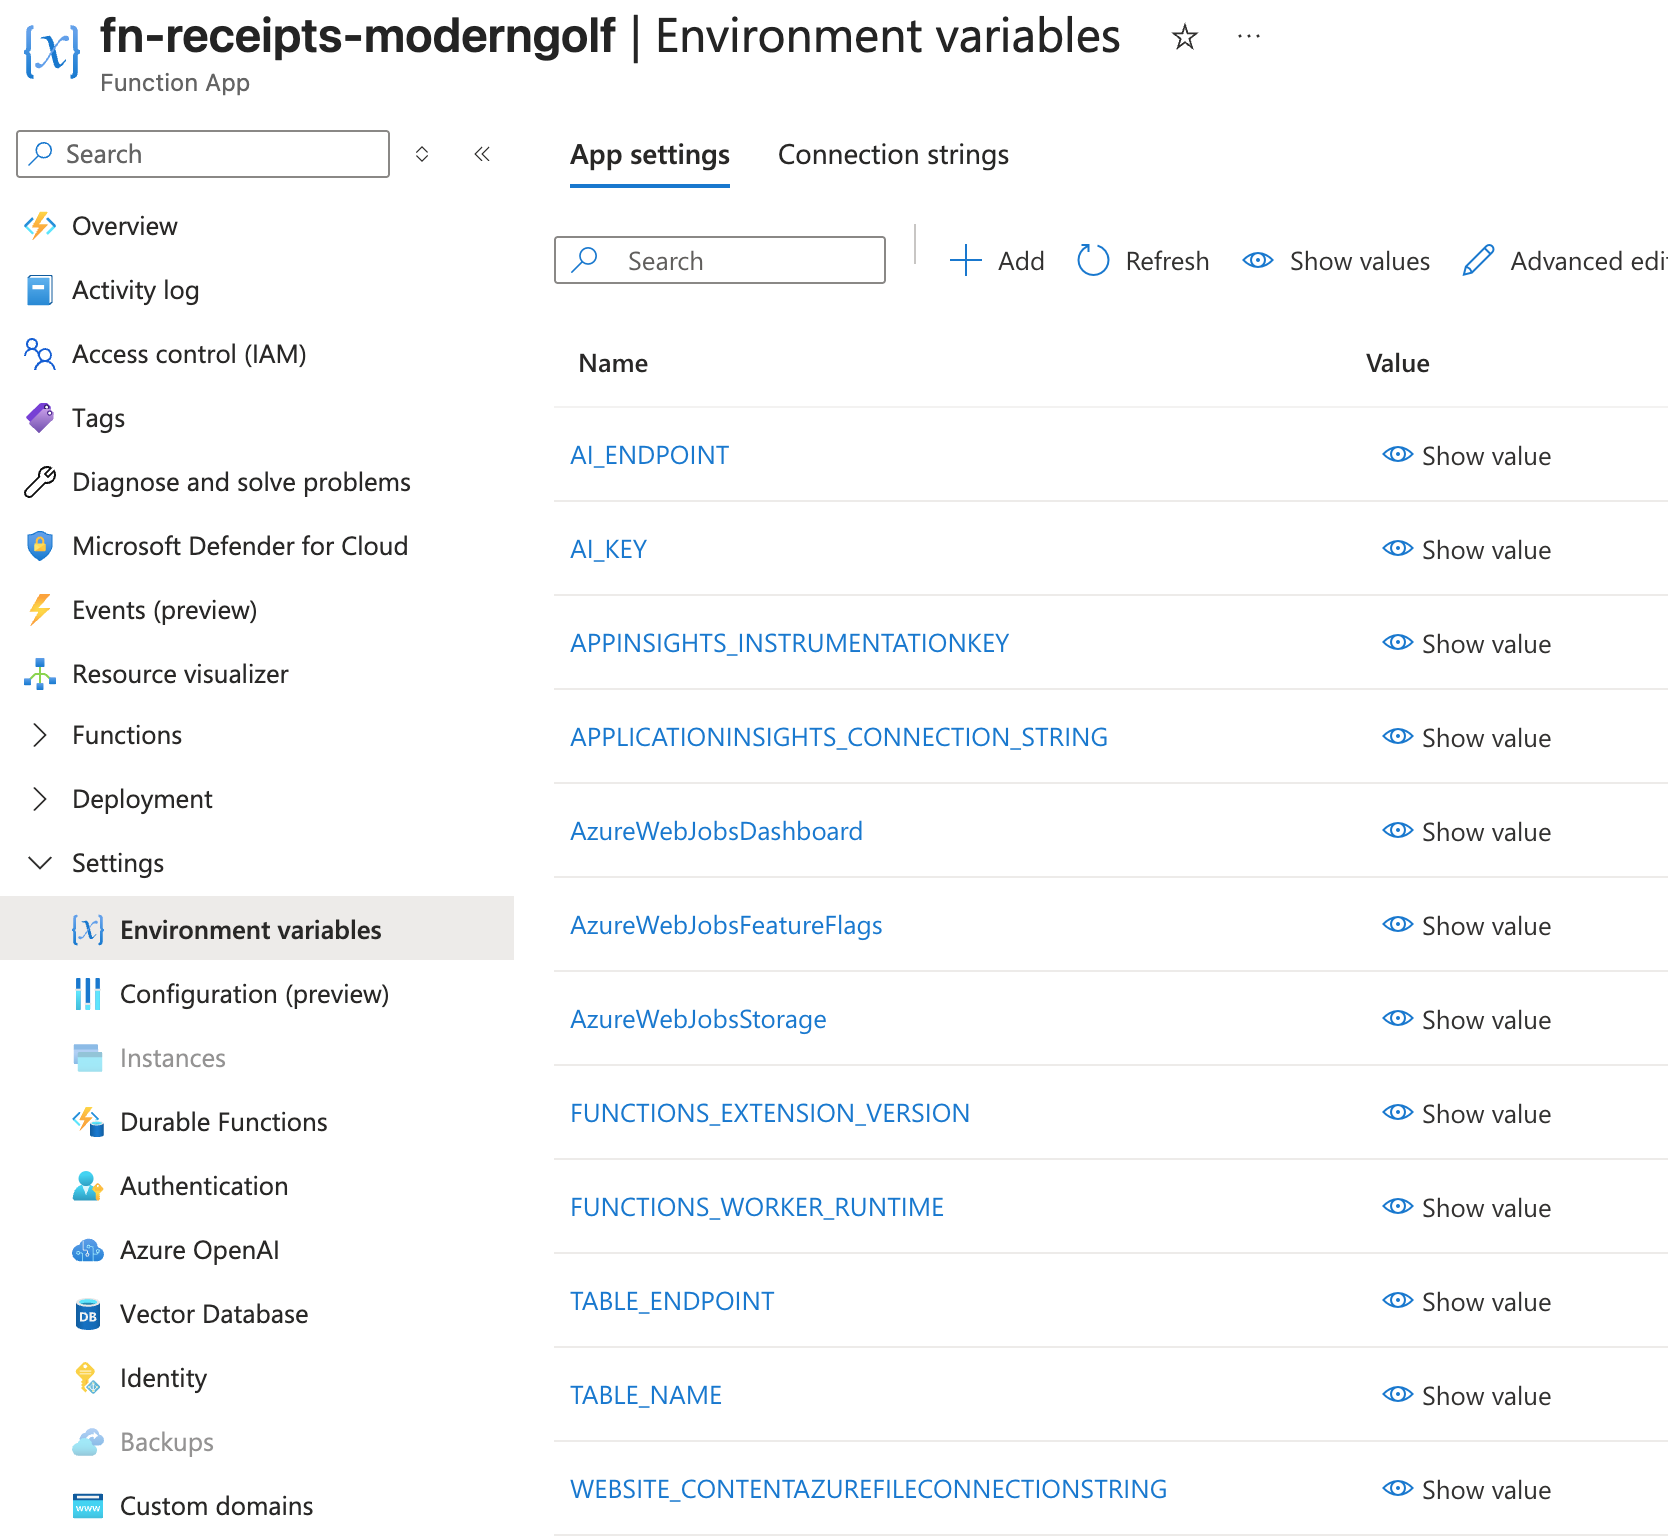
Configuration - App Settings
The Function App is automatically configured with the following environment variables:
AI_ENDPOINT- Azure AI Document Intelligence endpointAI_KEY- API key for Document Intelligence (Could be better to keep in KeyVault)TABLE_ENDPOINT- Azure Table Storage endpointTABLE_NAME- Table name for storing results (ReceiptsProcessed)APPINSIGHTS_INSTRUMENTATIONKEY- Application Insights instrumentation keyAPPLICATIONINSIGHTS_CONNECTION_STRING- Application Insights connection string
Function Requirements
Your Python function must:
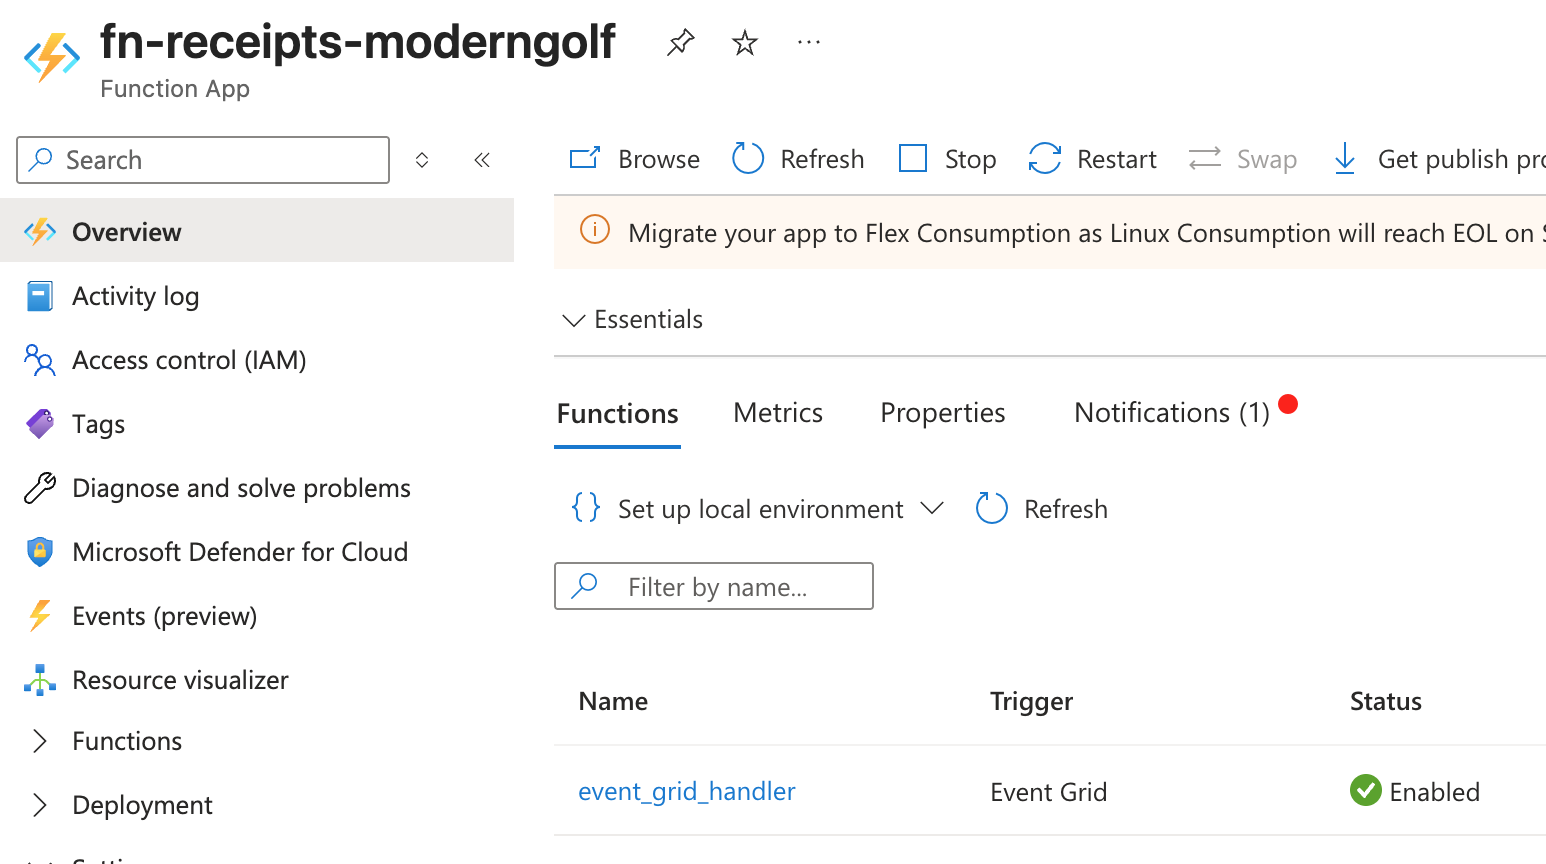
- Be named
event_grid_handler(or updateevent_subscription.tfaccordingly) - Accept Event Grid blob creation events
- Use the provided app settings to connect to Azure services
- Use managed identity for authentication (recommended) or the provided keys
Testing
Upload a Test Receipt
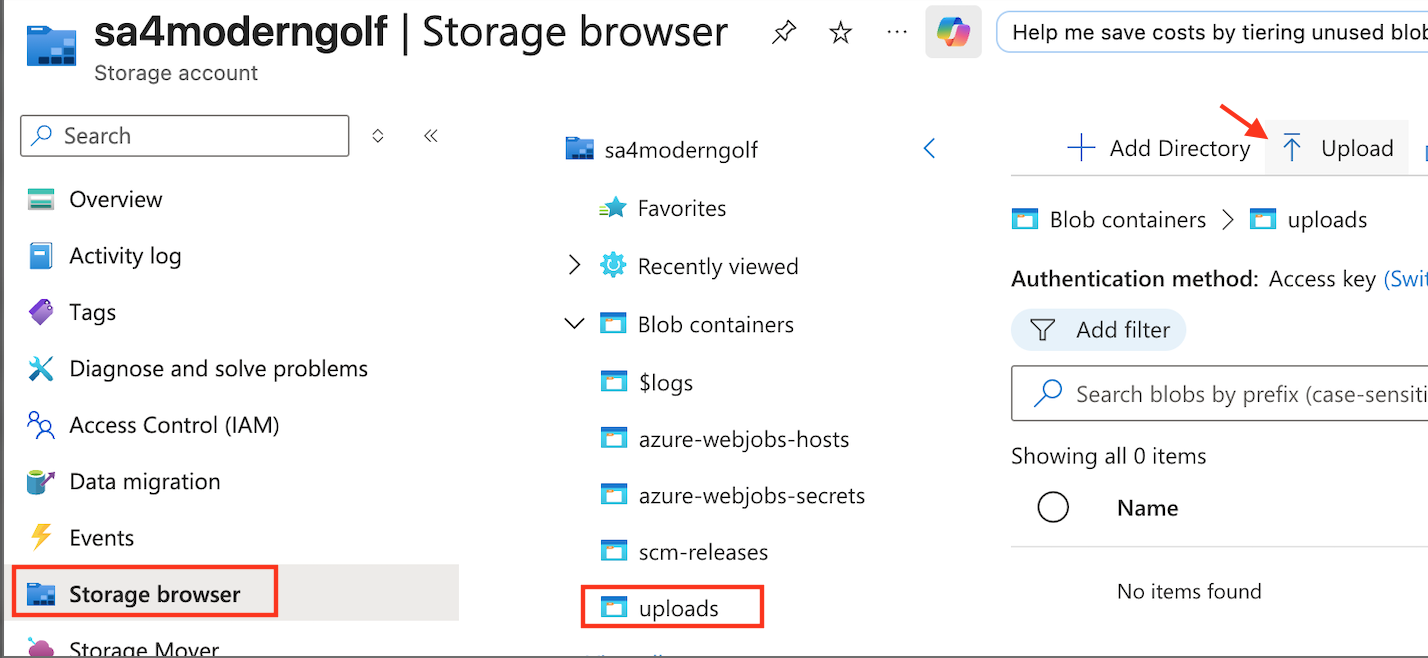
In Azure Portal
Go to the Storage account -> Storage browser -> Blob containers -> uploads and Upload Receipt image to the uploads container.
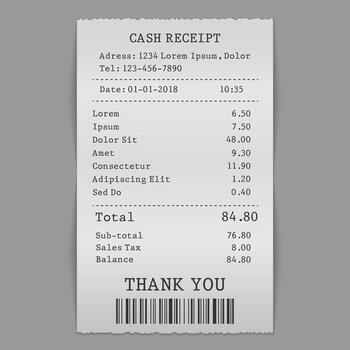
Receipt sample:
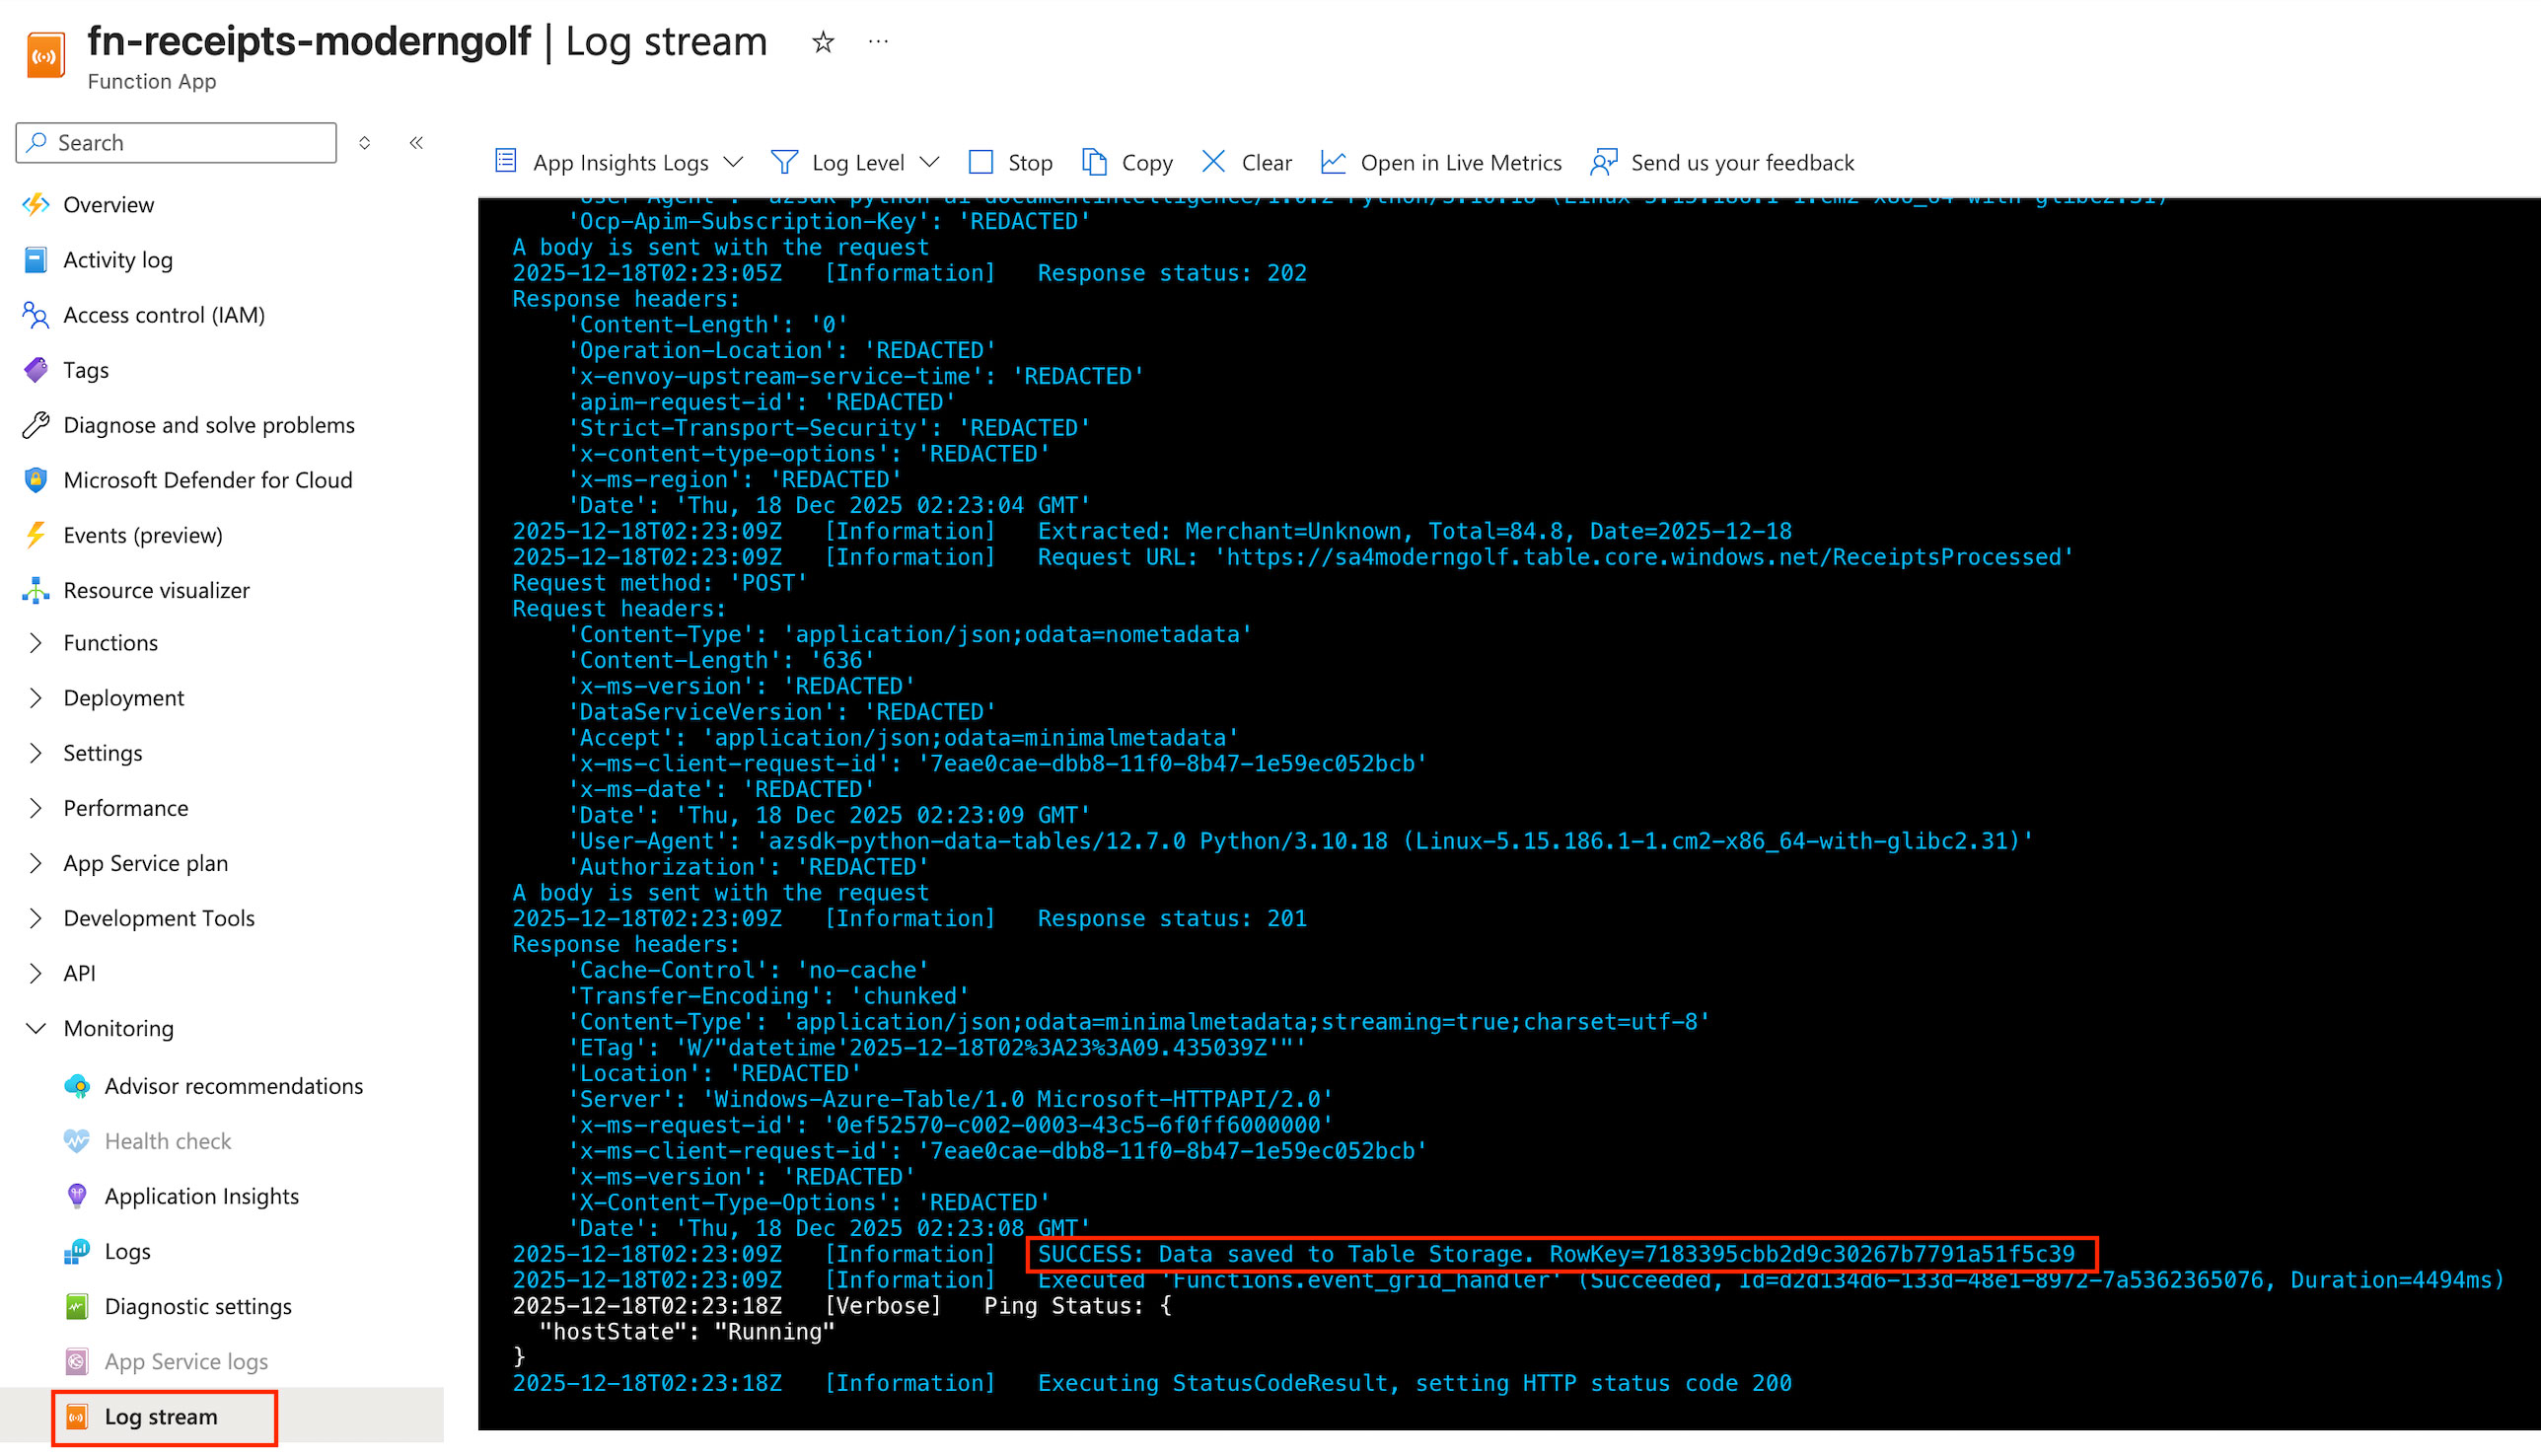
Go to FunctionApp -> Monitoring -> Log stream
Go to the Storage account -> Storage browser -> Tables -> ReceiptsProcessed

You can see that the data from uploaded receipt has been extracted and insert to Table.

Conclusion: The Backend is Ready
In Part 1, we established our foundation. A scalable, serverless backend that automatically processes receipts using an event-driven architecture. The logic is now tested and operates without us managing a single server.
In Part 2, we shift to the Frontend. We will build a Web App integrated with Azure Entra ID, allowing authenticated users to upload images and interact with the system intuitively.
Stay tuned for the next step!