Receipts to Data in Seconds: The Power of Azure Serverless (Part 2/2)
Building a secure, identity-aware Web App with .NET 8 and Azure Key Vault.

In Part 1, we built the Backend, a serverless extraction pipeline that turns receipt images into data.
In this Part 2, we will build the user-facing Frontend: a .NET 8 Web App that allows users to securely log in with their Microsoft account and upload receipts.
But we aren't just deploying a website; we are doing it securely. A major focus of this post is Secret Management. We will learn how to inject sensitive credentials (like Azure AD Client Secrets) into our app without ever hardcoding them in our configuration files.
Architecture Design
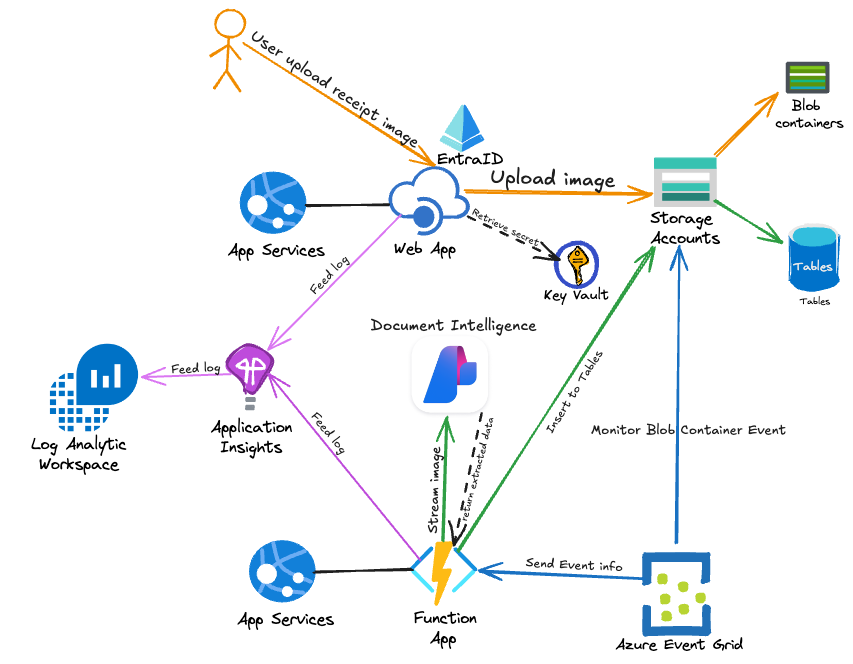
While Part 1 focused on data processing, Part 2 focuses on Identity and Security.
Flow of operations
-
User Login: The user accesses the Web App and authenticates via Microsoft Entra ID.
-
Secret Retrieval: To validate the login, the Web App needs a Client Secret. Instead of storing this in the app settings, the App Service fetches it directly from Azure Key Vault at runtime using its Managed Identity.
-
Upload: Authenticated users upload a file, which the Web App pushes to the Blob Storage container we created in Part 1.
The Stack (Part 2)
- Azure App Service (Linux): Hosting our .NET 8 Blazor/MVC app
- Microsoft Entra ID: Handling user authentication (OIDC)
- Azure Key Vault: Securely storing the Entra ID Client Secret.
- Managed Identity: The "ID card" for our Web App, allowing it to talk to Key Vault without a password.
The Security Challenge: "Where do I put my passwords?"
When configuring Azure AD authentication in a .NET app, you typically need three things in appsettings.json:
- TenantId (Public-ish)
- ClientId (Public-ish)
- ClientSecret (⚠️ Highly Sensitive)
The Anti-Pattern: Hardcoding the secret in your source code or Terraform files means it ends up in Git history. If that repo leaks, your identity system is compromised.
The Solution: We store the secret in Azure Key Vault and give our Web App a "Key Vault Reference." The app thinks it has the secret, but it's actually just a pointer.
Implementation
Step 1: Identity Setup
Part 1, we have deployed all the nessessary components including AppService Plan, WebApp, KeyVault but we haven't configured them. We will start with EntraID AppRegistration for handling user authentication (OIDC)
1. Create App Registration
Go to Azure Portal > Microsoft Entra ID. Select App registrations > New registration.
-
Name: webapp-receipt-processor (or similar).
-
Supported account types: "Accounts in this organizational directory only" (Single Tenant).
-
Redirect URI: (Web) [YOUR WEBAPP URI/signin-oidc] https://webapp-receipts-xxxxxx.azurewebsites.net/signin-oidc
2. Generate Client Secret
To validate logins, our Web App needs a "password" to prove its identity to Entra ID.
-
Go to Certificates & secrets > New client secret.
-
Add a description (e.g., "WebAppSecret") and set an expiration.
-
Copy the Value immediately. This is the only time you will see it.
3. Gather Required IDs
From the Overview blade, copy the following:
-
Application (client) ID
-
Directory (tenant) ID
Step 2: Securing the Secret (Key Vault)
Now we have a sensitive secret. Do not paste this into your appsettings.json or commit it to GitHub. Instead, we will store it in the Azure Key Vault we created in Part 1.
-
Navigate to your Key Vault in the Azure Portal.
-
Go to Objects > Secrets > Generate/Import.
-
Name: AzureAdClientSecret.
-
Value: Paste the secret you copied from Entra ID.
-
Click Create.
If you can't access Secrets
- Access policies -> Click Create
- Select Get / List / Set in Secret permissions panel > Click Next
- Search by "Your user name" > Select your user name > Click Next and Create
Now the secret is safely locked away.
- In KeyVault, Go to Overview and copy Vault URI. You will need this in further step.
Step 3: Access Control (Managed Identity)
Our Web App needs permission to open that vault. Since we enabled System Assigned Managed Identity in Part 1, our Web App has its own identity in Azure.
-
In the Key Vault menu, go to Access policies.
-
Click Create.
-
Secret Permissions: Select Get and List.
-
Principal: Search for your Web App's name (e.g., webapp-receipt-xyz).
-
Click Create.

NOTE: In KeyVault > Access Policies
In the Application section, you will notice that the WebApp's Managed Identity already has Secret Permissions (Get, List). This configuration was set up by the Terraform script we executed in Part 1. (Step 3 could be skipped.  )
)
Step 4: WebApp Environment Variable
Now we connect the pieces. We need to tell the Web App where to find the Tenant ID, Client ID, and that secret stored in Key Vault.
- In Azure Portal, Go to your Web App > Environment variables.
- Click "Show values" and filling in
AzureAd__DomainYou could find it from EntraID Overview (Primary Domain)AzureAD__TenantIdYou could find it from EntraID OverviewAzureAD__ClientIDYour AppRegistration ClientID- For AzureAD__ClientSecret =
@Microsoft.KeyVault(SecretUri=`YOUR VAULT URI from Step2`/secrets/AzureAdClientSecret/)
Step 5: The Frontend Code (.NET 8)
Build, Test and Deploy ImageUploaderApp to WebApp
We will do this in VSCode. This method is great for testing because you see the results immediately.
Prerequisites:
Install the following VS Code extensions.
- C# Dev Kit
- .NET Install Tool (Then press F1 and search for
Install the .NET SDK System-Wide)
Publish to WebApp
- In VSCode, Go to Terminal > New Terminal
- Go to folder ImageUploaderApp by
cd ./ReceiptApp-Web/ImageUploaderApp/
- Run the following command to create a publish package in a root folder.
dotnet publish -c Release -o ./publish
Now you can see publish folder appears under ImageUploaderApp in the Explorer
- Right click on the
publishfolder >Deploy to Web App... - Select web app resource
webapp-receipts-xxxxx - When prompt, click Deploy
Once this success, you have completed everything.
Final Testing
- Open Browser and go to web app URL. Similar to
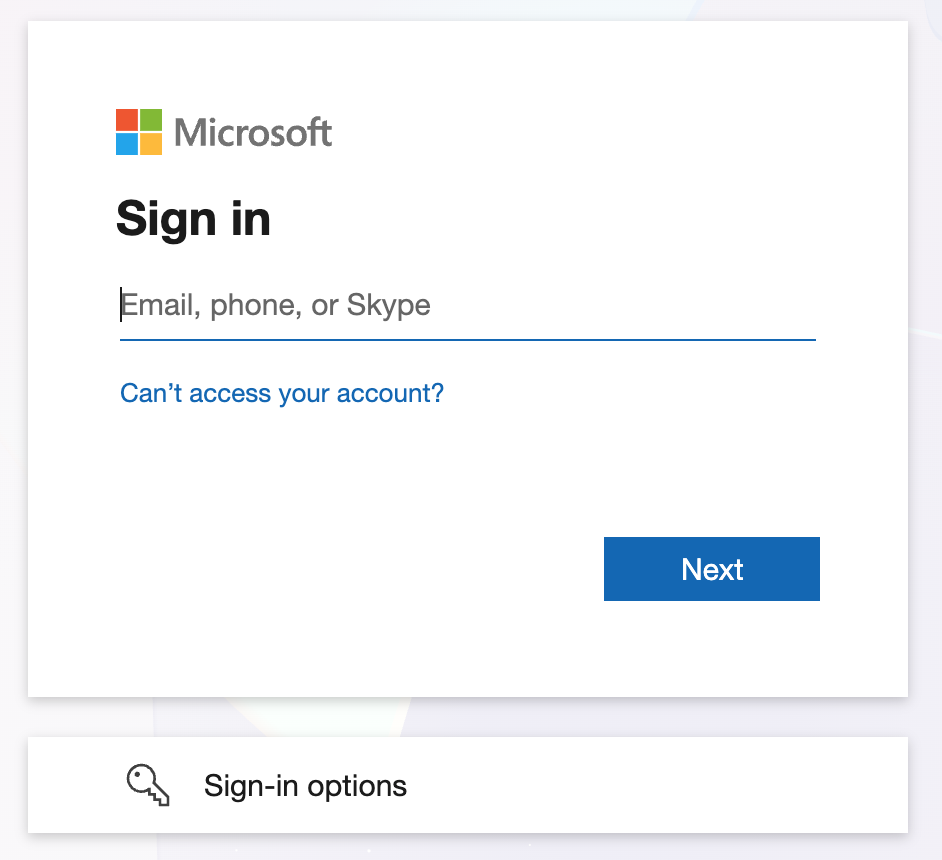
(https://webapp-receipts-xxxxxxx.azurewebsites.net/) - You will be authenticating with EntraID if you haven't already.
- Once you authenticated, you should see the web app ready to upload the receipt.
- Once upload the receipt, check the data extract result by go to Storage Account > Tables